Bench, Posture, and Relaxed Hands
Updated: 2026-07-10By the end of this lesson, you will be able to adjust the bench to your body, make a natural line from forearm through wrist, and perform a three-position check before playing. Good posture is not a frozen pose. It is a balanced starting point that lets your shoulders, elbows, and fingers move without holding extra tension.
Try now
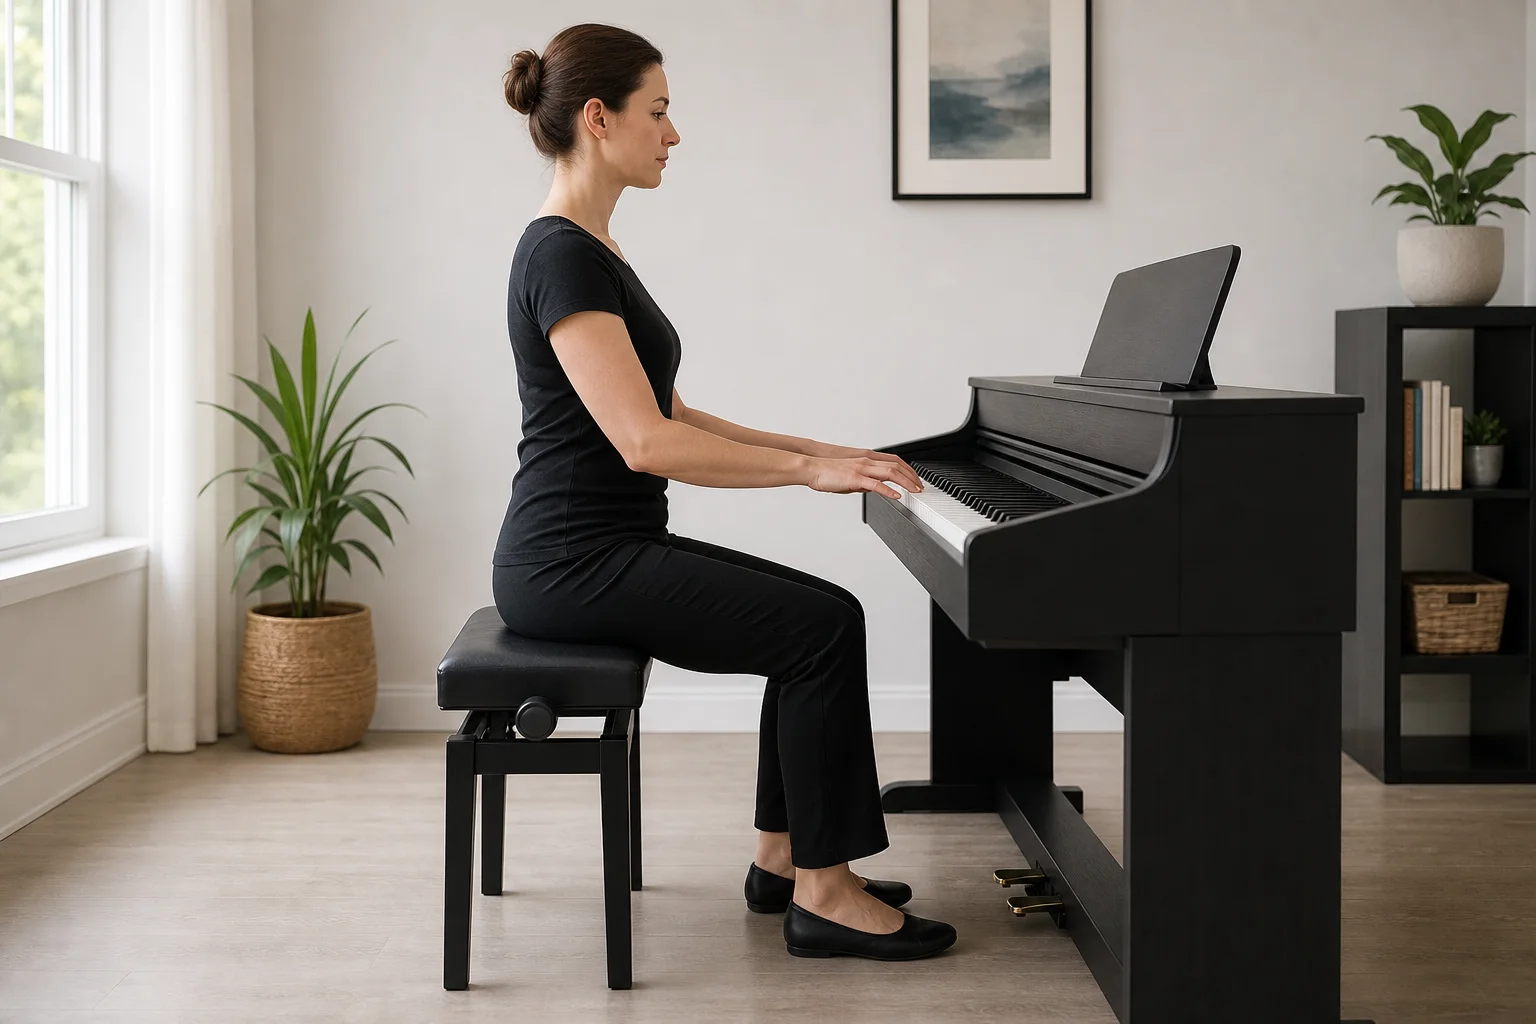
Sit on the front half of the bench with both feet secure and let your arms hang at your sides. Exhale once, then bring your hands to the middle of the keyboard without lifting your shoulders. Notice which area tightens first.
Adjust from the bench toward the keys
Center the bench and sit on its front half. Place your weight on your sit bones rather than your tailbone. Both feet should meet the floor; use a firm footrest if they hang. Keep your back naturally long without arching or collapsing.
At the right distance, your elbows sit slightly in front of your torso. If you straighten your arms or reach with your neck, move closer. If your elbows are pinned behind you and your wrists fold, move back. Change one variable at a time.
Set the height so your elbows are near key level. Your forearms may slope slightly, but your wrists should not bend sharply to put your fingertips on the keys. A firm, flat cushion can raise a fixed bench temporarily. A soft cushion that sinks will keep changing your balance.
Keep shoulders and wrists neutral
Relaxed shoulders are not forced downward. Exhale and let them return naturally. Do not clamp your elbows against your ribs. Leave room for each hand to line up with its forearm. The wrist is a flexible bridge, neither collapsed nor raised before every note.
Lift your hands a few inches from the keyboard and let the forearms settle lightly into your lap. If the shoulders remain high or the fingers lock, stop before playing. Pain, numbness, burning, or sharp sensations are not conditions to practice through. Rest, adjust the setup, and seek qualified guidance if symptoms return.
Shape the hand without gripping
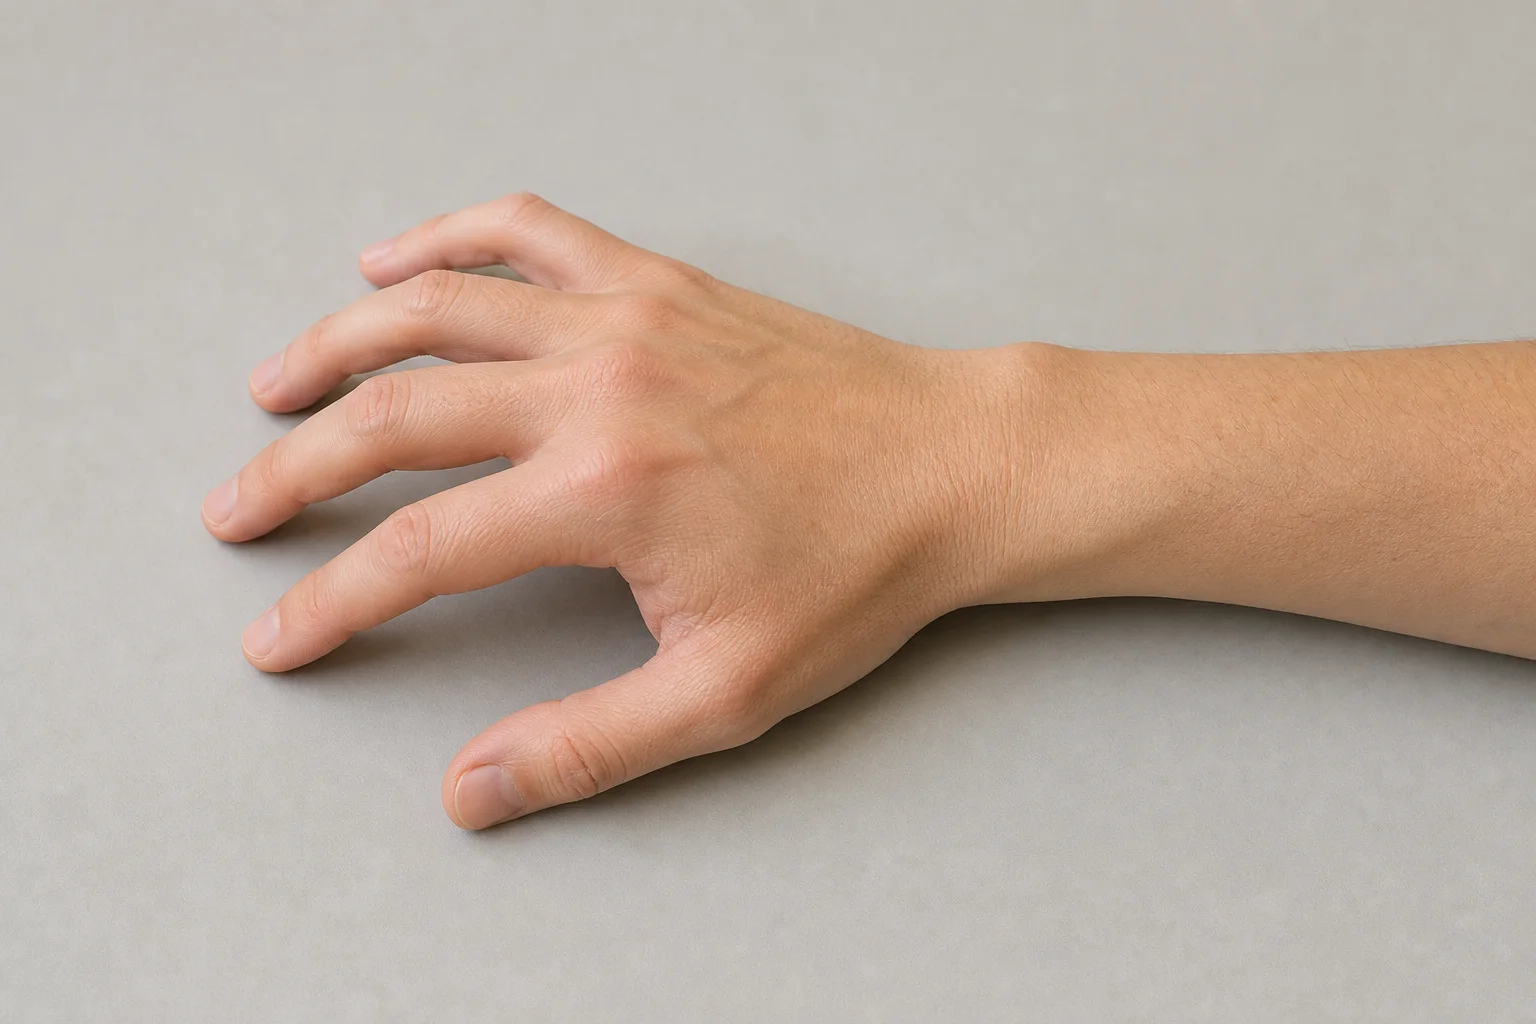
Let one hand hang at your side and observe its natural finger curve. Bring that shape to five white keys. The thumb contacts with its soft outer edge near the tip; the other fingers use the fingertip pads. Keep the joints nearest the nails from collapsing, but do not curl the fingers into hooks.
Raise one finger a few millimeters and return it while the others touch lightly. If the entire hand jumps, you are lifting too high or pressing the waiting fingers down. Level 1 calls for small independent movements inside a hand that remains supple, not strength or speed.
Exercise
Use this three-position check before your first three playing attempts each day. Hold each position for one breath; the complete check takes less than a minute.
- Away from the piano: Sit on the front half of the bench, secure your feet, and let your shoulders settle. Turn your head gently both ways to confirm your neck is free.
- Hands hovering: Raise your forearms and stop about an inch above the keys. Check that the elbows are near key level and each wrist continues its forearm.
- Hands on keys: Place five fingertips on five white keys. Keep the soft arch, exhale, and lift each finger once at a very low height.
After the check, play five neighboring keys slowly. If your shape changes at the first note, stop. Adjust the bench or reduce pressure, then restart from position 1 instead of holding a rigid hand.
Common mistakes
- Symptom: Your shoulders rise as soon as your hands approach the keys. Correction: Move slightly closer, exhale, and raise the arms with soft elbows.
- Symptom: Your wrist makes a clear angle or repeatedly sinks below the keys. Correction: Adjust bench height and reduce fingertip pressure until the forearm and wrist align more naturally.
- Symptom: Your fingers curve, but the palm feels as if it is squeezing an object. Correction: Drop the hand at your side to recover its natural shape, then place it without gripping.
Practice pack
1. Prepare
Place a phone or mirror at your side if available, using it only to inspect the shoulder-elbow-wrist line. Clear the bench legs and pedal area so both feet have stable support.
2. Core drills
Perform four rounds of the three-position check. Change only one item per round: bench distance, height, foot position, or shoulder release. Note which change creates the easiest forearm line.
3. Variations
With your hands on the keys, say "shoulders, wrists, fingertips" over three steady beats. Each word cues an observation, not an attempt to force your body into a pose.
4. Self-check
A round succeeds when you breathe normally, move the elbows slightly, and lift each finger low without shifting the bench or torso. Comfort must come with stability.
5. 5-minute route
Adjust the bench for two minutes, perform the check twice, and play five slow keys for one minute. Use the final minute to correct the first visible tension sign.
6. 15-minute route
Test two nearby bench distances, choose the more balanced one, perform four checks, and play five keys softly. Finish with one round without looking in a mirror.
Frequently asked questions
Must my back be perfectly straight? No. Keep your torso balanced and long enough to breathe, not locked like a column. You can hinge slightly at the hips when moving toward distant keys.
Why is finger 4 hard to lift alone? The hand's structure gives finger 4 less independence. Lift it only a little and never force it; an even result matters more than height.
Is mild fatigue normal? A new position may feel unfamiliar, but pain, numbness, burning, or sharp sensations mean stop. Rest and check the bench and touch. Consult a health professional or experienced teacher if symptoms return.
Ready to continue when
- You adjust bench distance and height using visible signs.
- Your shoulders stay released and your wrists near neutral at the middle keys.
- All five fingers form a soft arch without collapsed joints or a gripping palm.
- You complete the three-position check before playing.