
Choosing a Piano and Setting Up
Updated: 2026-07-10By the end of this lesson, you will be able to compare three common instrument types against your actual needs and complete a setup check covering key count, stand, bench, pedal, lighting, and reach. The goal is not to find the "best" piano. It is to create a stable place where you can sit down and practice regularly.
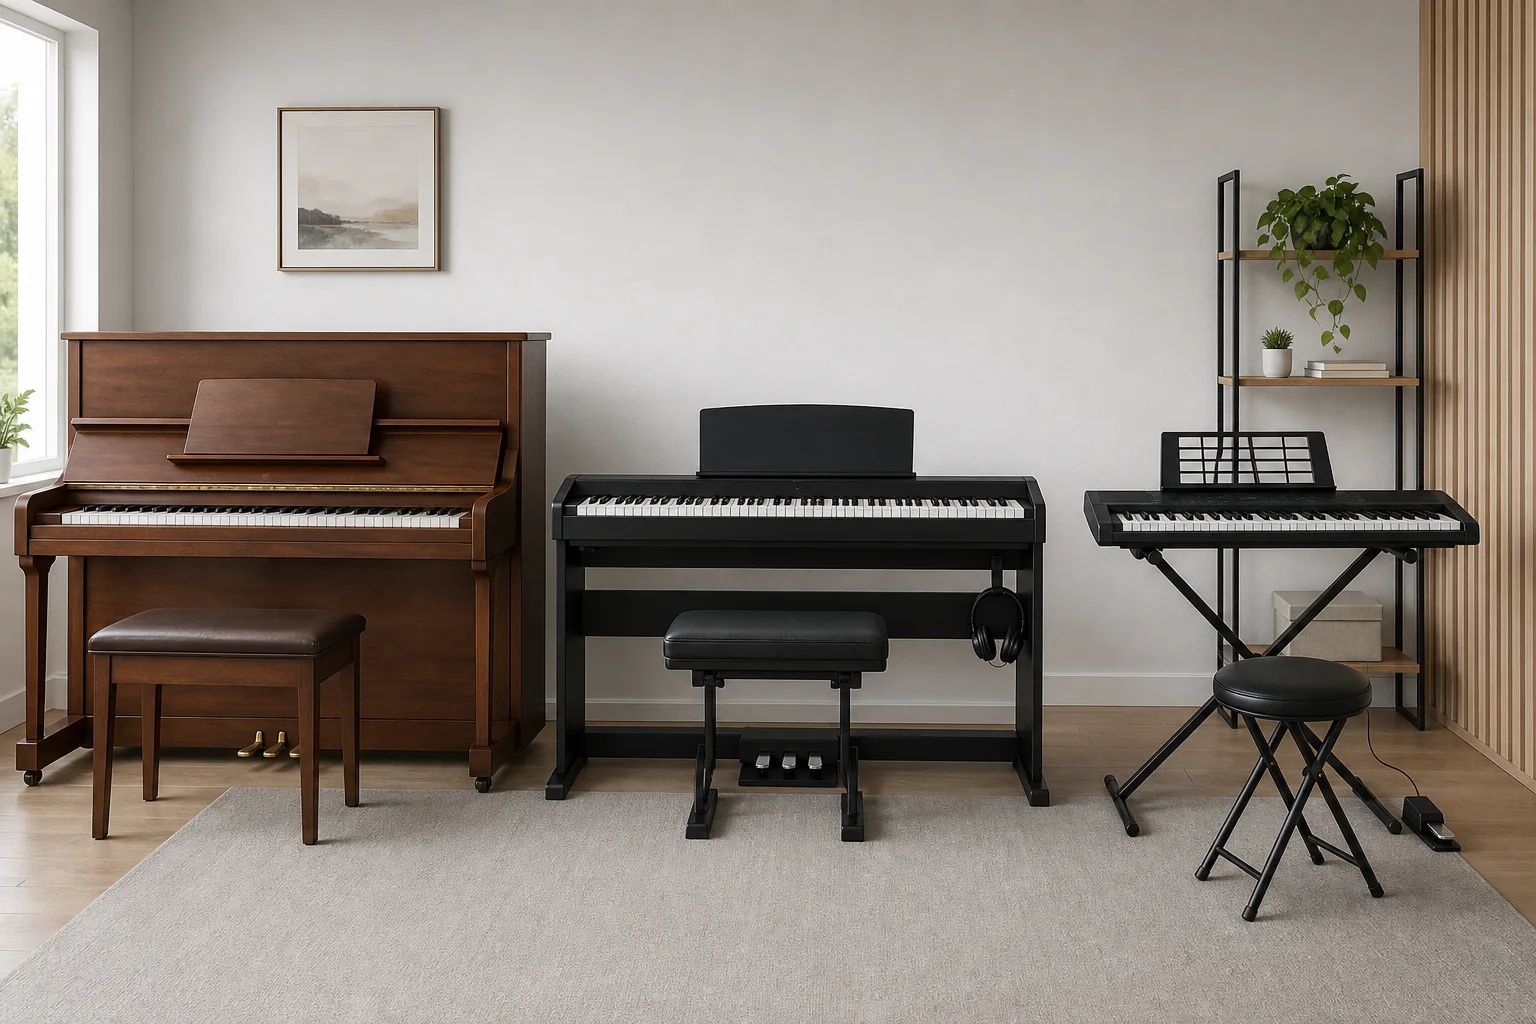
Try now
Measure the width and depth of the place where you plan to put the instrument. Then write down one time of day when you can usually practice without disturbing anyone. Those two measurements and one time slot are your first filters, before price or extra features.
Choose for the work you will do every day
An acoustic piano uses hammers and strings. It gives direct feedback but needs a permanent location, maintenance, and touch-based volume control. An 88-key weighted digital piano gives you the full range, piano-like resistance, volume control, and headphones. A smaller keyboard is easier to store, but its key count, action, stand, and pedal support vary.
An 88-key weighted digital piano is a practical long-term choice, not an entry requirement. If your space only fits a 61-key keyboard, use it and note its limits. A small keyboard at the right height is more useful than a large instrument that lifts your shoulders or shakes under a moderate touch.
Build a system around the instrument
The stand should stay still under moderate force. The bench should be firm, have no armrests blocking your elbows, and reach the correct height through adjustment or stable support. Place the sustain pedal under your right foot without twisting your hips. Light the music and middle keys without shining into your eyes.
Sit centered at the instrument and reach toward the middle keys. If your shoulders move forward, the instrument is too far away. If your elbows are trapped against your sides, it is too close. Secure power and pedal cables so the bench and your feet cannot catch them. Give headphones a fixed resting place so standing up cannot pull the keyboard over.
Sort decisions into three priorities
Label each requirement must have, useful, or later upgrade. A stable stand and correctly sized bench are must-haves. Headphones may also be essential in an apartment. Three pedals are usually a later upgrade at this level. This prevents an impressive sound list from distracting you from the bench, pedal, or support you need to play comfortably.
Do not judge an instrument from a demo alone. Play five neighboring keys slowly, first softly and then at medium volume. Listen for controllable loudness. Check every key, the pedal, and the music rest. Have a qualified person assess a used instrument rather than guessing from appearance.
Exercise
Make a personal setup sheet with these six lines. Record what you can observe, not a generic shopping list.
- Keys and feel: How many keys does the instrument have? Are they light, semi-weighted, or piano-style weighted keys?
- Stand: What support does it use? Does it move when you play C-G with moderate force?
- Bench: What height places your elbows near key level? Do your feet reach the floor or a firm footrest?
- Pedal: Is sustain available? Does the pedal body stay under your right foot while its cable runs safely clear of your feet and bench?
- Lighting: Can you clearly see the music and middle-C area at your normal practice time?
- Reach: Can you touch the middle and both ends of the keyboard without lifting a shoulder or losing balance?
Mark each line "ready," "adjust," or "missing." Choose one item to fix today, such as stabilizing the stand or moving the lamp.
Common mistakes
- Symptom: The instrument is capable, but your shoulders rise and your wrists angle down. Correction: Fix the bench and stand height before judging the key action.
- Symptom: The pedal slides farther away every few presses. Correction: Put it on a nonslip surface and route the cable so your foot travels straight down.
- Symptom: You postpone practice because setup and storage take too long. Correction: Leave the bench, music rest, and power ready; store only what the room requires you to remove.
Practice pack
1. Prepare
Bring a tape measure, paper, and pencil to the actual practice location. Clear the walkway around the bench and check the outlet before sitting down.
2. Core drills
Complete all six setup lines. Perform a real check for each one: move the stand gently, play C-G, press the pedal, switch on the light, and reach both directions.
3. Variations
If you are comparing two instruments, score both on the same six criteria from 0 to 2. Do not add points for sounds or functions you do not plan to use.
4. Self-check
Every conclusion should point to evidence. "The bench is low because my elbows sit below the keys" is more useful than "This feels uncomfortable."
5. 5-minute route
Measure the space, check the stand and bench, and correct one unstable item. Finish by sitting down and touching five keys without leaning forward.
6. 15-minute route
Complete the full sheet, test the pedal and lighting, then play C-D-E-F-G three times softly and at medium volume. Record one upgrade that can wait and one adjustment to make now.
Frequently asked questions
Do I need to buy an 88-key piano now? No. An 88-key weighted instrument supports the full long-term course, but Level 1 uses a small range. Learn on a stable instrument now and upgrade when a real limitation blocks the work.
Can I use an office chair? Only as a temporary solution if the wheels and swivel lock, the armrests do not obstruct you, and the height stays fixed. A firm bench makes distance easier to control.
Do I need three pedals? Not yet. Check the right sustain pedal first. Lesson 4 distinguishes all three pedals, and the middle pedal may serve a different function on different instruments.
Ready to continue when
- You know your instrument's key count, key response, and available pedal.
- The stand, bench, and pedal remain still during a C-G test.
- The lighting is clear, and you reach the keyboard without lifting your shoulders.
- Your six-item sheet has a status for every line and one priority adjustment.